Как связать игрушку, чтобы у нее крутилась голова или лапки

So, you have already knitted your first few toys. Do you want to add something else?
And if you add a little functionality, for example, make the head or paws movable, the toy will become even more interesting and interactive! Here are some examples of how to knit a toy with a rotating head or paws so that it can take different poses and please its owner.
Why are movable toys so attractive?
- [Interactivity]: Movable elements allow a child (or an adult!) to interact with the toy, change its pose, and come up with different stories.
- [Motor development]: Manipulations with movable parts develop fine motor skills of the hands and coordination of movements.
- [Uniqueness]: A toy with movable elements looks more alive and interesting than a static one.
Basic methods of attaching movable elements
There are several ways to attach the head and paws, allowing them to rotate. Let’s look at the most popular ones:
Button fastening
Description: This is the simplest and most common method. Two large buttons and a strong thread (such as iris or floss) are used.
How it works: The button is sewn to the body of the toy, and the second one is sewn to the head or paw. The thread passes through both buttons and the body of the toy, forming a hinge.
Advantages: Ease of execution, availability of materials.
Disadvantages: Not a very strong fastening, may be unsafe for small children (buttons may come off).
Instructions:
- Knit the body and head/paws of the toy.
- Determine the place of fastening.
- Sew the button to the body of the toy.
- Sew the button to the head/paw.
- Connect the buttons with a strong thread, passing it through the holes several times.
- Tighten the thread so that the head/paw fits snugly to the body but can rotate freely.
- Fasten the thread and hide the ends inside the toy.
Splint fastening
Description: A more reliable and professional method. Special splints (metal rods with forked ends) and disks (cardboard or plastic) are used.
How it works: The disks are attached to the body and head/paw. The splint passes through the holes in the disks and the body of the toy, and its ends are bent, fixing the connection.
Advantages: Very strong and reliable fastening, allows the head/paws to rotate freely.
Disadvantages: Requires special materials and tools (splints, disks, pliers).
Instructions:
- Tie the body and head/legs of the toy together.
- Determine the attachment point.
- Sew the disks to the body and head/leg.
- Insert the cotter pin into the holes in the disks and body.
- Use pliers to spread the ends of the cotter pin to secure the connection.
- Make sure the head/leg rotates freely.
Thread (Hinge) Attachment
Description: Also known as a “thread hinge” or “thread hinge”, this method is a happy medium between the simplicity of a button mount and the reliability of a cotter pin.
How it works: Instead of buttons, strong threads are used that are threaded through the body and head/leg, creating a flexible but strong hinge. Small cardboard or plastic disks are often used for reinforcement, just like the cotter pin mount, but a thread is used instead of a cotter pin. Advantages: Quite strong fastening, allows the head/legs to rotate and even bend a little, looks neat, does not require special tools except for a needle and thread.
Disadvantages: Requires care when tightening the thread so as not to overtighten or loosen it.
Instructions:
- Tie the body and head/legs of the toy.
- Determine the attachment point.
- If using disks: sew one disk to the inside of the body and to the base of the head/paw. Make sure that the holes in the disks match.
- Thread a strong thread (preferably in several folds) through the needle.
- Pass the needle with the thread through the hole in the disk on the body, then through the hole in the disk on the head/paw.
- Pass the needle back through the hole in the disk on the head/paw and then through the hole in the disk on the body.
- Make several such passes so that the thread tightly, but not tightly, connects the parts.
- Tighten the thread, adjusting the degree of movement. The head/paw should rotate freely, but not dangle.
- Make several knots at the end of the thread inside the toy to secure the connection. Cut off excess thread.
- If disks are not used, the thread is threaded directly through the tightly stuffed body and the base of the head/paw, also making several passes for strength.
Tips for choosing a fastening method
- For the little ones: [For children under 3: completely exclude buttons]. Use only thread fastening with strong threads (in 6-8 folds) or cotter pins with protective caps.
- For collectible toys: Cotter pin fastening is an ideal choice for creating professional designer toys, as it provides maximum strength and durability.
- For beginners: The button or thread method is a great start for those who are just mastering knitting toys with movable elements.
Additional Tricks for Making Moving Toys
- [Padding]: The density of the padding plays an important role. Too dense padding can hinder movement, and too loose padding can make the joint wobbly. Experiment to find the optimal balance.
- [Size of Parts]: For button and thread fastening, choose buttons or disks proportional to the size of the toy. Buttons that are too big can look unsightly, and buttons that are too small will not provide sufficient strength.
- [Thread Strength]: Always use strong threads for fastening. Cotton threads, reinforced threads, or special toy threads are best.
- Interesting fact: Japanese craftsmen sometimes pass the thread through a thin silicone tube to strengthen the hinged fastening, which prevents the thread from rubbing against the filler and increases the smoothness of the rotation of the parts.
- Accuracy: Regardless of the chosen method, accuracy and patience are your main allies. Carefully hide the ends of the threads and securely fasten the knots.
Examples of toys where movable parts are especially appropriate
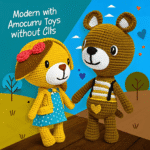
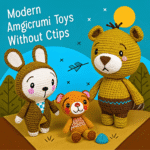
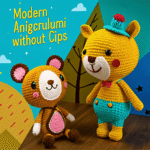
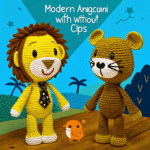
- Teddy bears: A classic of the genre! Movable paws and head allow the bear to take a variety of poses, making it more lively and expressive.
- Animals: Ears, tails, paws of cats, dogs, hares – all this can be made movable, adding realism and play opportunities.
- Dolls: Movable arms and legs allow dolls to sit, stand, hold objects, which makes playing with them more exciting.
- Fairy tale and cartoon characters: Favorite heroes with movable body parts will become even closer and more interesting for children.
Conclusion
Creating knitted toys with movable parts is a fascinating process that opens up new horizons in the world of handicrafts. By choosing the right method of fastening and showing a little patience, you can revive your creations, making them not just toys, but real friends who will delight you for many years. Experiment, create and let your toys be the most active and beloved!
Popular Products
-
 Товар99,00 ₴
 -
 Mug BHeart5,00 ₴
 -
 Phone Case Canvas9,95 ₴